 Try Me, I’m Cheap & Easy
Eva Keuhlem, a Master Gardener for over 15 years and a garlic grower for many years before that, shares her experience with us.
Why not give it a whirl in your garden?
Garlic is one of the easiest things to grow. I plant about 250 plants each year. Most articles make it sound complicated, but it is not. It tolerates almost all types of soil and rarely has a problem. In over 25 years of planting I have never had a problem with my garlic! In fact it is so eager to grow, that if you throw your peel away after using a clove, the bottom root end will even grow. I used to put the whole peel in my compost pile and after using the compost I would get garlic plants where I had never planted any! It took me a while to figure that one out! They now go in the green box for garbage. Follow these easy steps and you’ll not go wrong.
- Fall is the best time to plant garlic but in a pinch you can plant very early in the spring, once you can work the ground. Generally plant around the end of October to middle of November, as long as the ground has not frozen, making sure to rotate the planting location each year.
- Get the garlic that you wish to plant from a reputable source. e.g. William Dam Seeds or any other local supplier. I have been lucky to have started with garlic my Dad had been planting for over 60 years.
- Cultivate the area you will be planting in to remove weeds. Add some compost or even peat moss if the ground is very heavy.
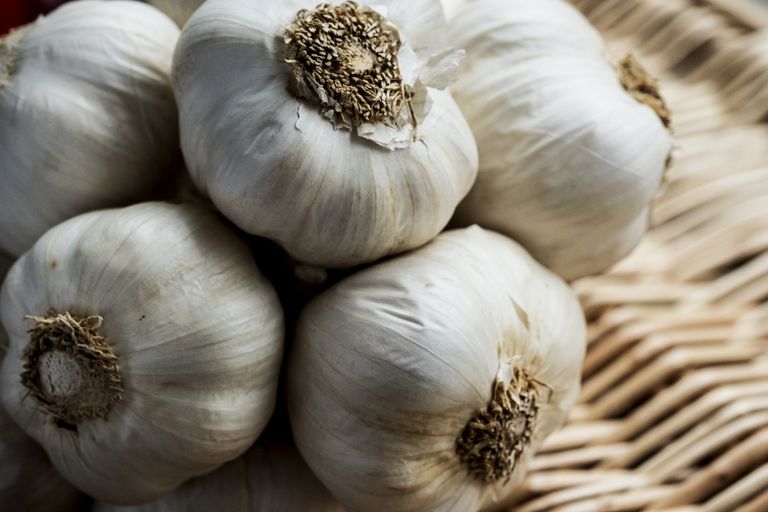
- Separate the head into individual cloves (usual yield is about five cloves per head) and always use the biggest cloves for your planting.
- Plant the cloves about 4 inches apart and about 2 to 3 inches deep with the pointed end up. The tip should be below the ground.
- Cover with soil and then cover with shredded leaves or a mixture of shredded leaves and grass about 2 or 3 inches deep. Another option would be a layer of straw, again 2 to 3 inches deep. This will help to keep down the weeds in the Spring and Summer before you harvest as it is very labour intensive trying to weed between the plants. You may see the cloves sprouting a bit in the fall already but do not worry, they will not be harmed or freeze. In the spring they will start growing vigorously.
- When you see the garlic scapes coming up (immature flower stalks which is them wanting to go to seed) pull on the scapes to remove them (they may make a popping sound) and let the plant continue growing. Scapes are sold in stores and are delicious steamed or sautéed.

Garlic Scapes - In the beginning of July stop watering the garlic. You will also see the tops of the plants starting to turn brown. This means they are almost ready to harvest which is usually about the middle of July.
- Dig each plant up carefully so you do not bruise them with the shovel. Some may even pull right out of the ground. Shake off the excess dirt.
- Lay your whole plants in a single layer in a dark, dry place for a week to two weeks
 to let them cure. Garage or shed works well.


